Build a fast, secured and free static site in less than 3 hours
A free static site tutorial. Host the website on Github. Use a secured custom domain name with Cloudflare
Note: Unless you’re a developer or you want to learn how to do sites, my first advice is to avoid to build your own static site. You can get a similar service bundled with other advantages on Medium
Everything starts with the idea to build a website to host my work. On the road, it became obvious that the first article has to be precisely on how to do it. And here it is.
To be effective I picked Hugo that I already know. It is as well, very fast, cross-platform, open source and ranked in the top 3 of static website generators: a very solid pick.
Everything as to stay free, so the generated pages are hosted in a Github repository side by side with the website source code. It comes with a Github sub-domain served over a secured HTTPS connection for free as well.
For my own needs I have added two extra goals at the end of the article. They are not interesting for everyone, feel free to drop them:
- A beautiful code syntax highlighting of a wide range of languages. (free)
- A secured custom domain name (few bucks per year)
And yes, it should be done in less than 3 hours!
what we get at the end
No costs.
A complete control.
A very fast static site.
A secured website.
A website compliant to best practices.
A minimalist design.
A beautiful code syntax highlighting of a wide range of languages.
Setup the development environment
Create the directories structure
mkdir -p ~/Sources/fillmem
cd ~/Sources/fillmem
mkdir bin
mkdir site
Install Hugo
Check what’s the last Hugo release and download the right version for your environment. My environment is a 64 bits MacOS.
curl -L -s -o bin/hugo.tar.gz https://github.com/gohugoio/hugo/releases/download/v0.26/hugo_0.26_macOS-64bit.tar.gz
tar xvzf bin/hugo.tar.gz -C bin/
Verify that the Hugo generator is working properly by making it print its version
./hugo version
Hugo Static Site Generator v0.26 darwin/amd64 BuildDate: 2017-08-07T08:09:45+01:00
Create the Github repository
I chose to do a user/organization page as I’m building my website. If you stick to this choice you can follow the next steps. Otherwise you’re on your own!
To get user page features activated the repository has to be named in a specific way. It’s easier to understand with the example of this site.
My account username is gsempe at the address https://github.com/gsempe.
This site is hosted in the repository named gsempe.github.io at the address https://github.com/gsempe/gsempe.github.io
You have to follow this scheme.
If your Github username is jcarmack, creates the repository jcarmack.github.io. Make it public, do not add a README file, neither a .gitignore or a license file. The master branch is the branch where generated pages are hosted, you don’t want any non mandatory files there.
Initiate repository branches
Push the first commit on the master branch to create it. Generated pages will be pushed on this branch.
cd site
git init
git remote add origin git@github.com:jcarmack/jcarmack.github.io.git
git commit --allow-empty -m "Start the public branch"
git push -u origin master
Create the source branch. Website source code will be pushed on this branch.
The source branch has to have a .gitignore file to avoid to commit generated or temporary files. I use the online tool gitignore.io to generate .gitignore files. It is very convenient to get the usual files to ignore regarding OSX, vim and Hugo in one curl command.
git checkout --orphan source
curl -L -s -o .gitignore https://www.gitignore.io/api/osx%2Cvim%2Chugo
git add .gitignore
git commit -m "Start to fill the memory"
git push origin source
Verify that the .gitignore file generated at the previous step contains the line /public/. If the line does not exist add it and commit this change.
cat .gitignore | grep public
/public/
Use the git worktree feature to checkout the master branch to the ignored public sub-folder.
Why? By default, Hugo generates the site in the public folder. To have the master branch mapped to the public folder makes possible to easily chain site generation and publication steps without moving around files.
rm -rf public
git worktree add -B master public origin/master
Configure and generate the site
The environment setup is done and it’s finally the moment to make the actual site.
Create a new empty site tree
git checkout source
../bin/hugo new site . --force
git add config.toml archetypes/default.md
git commit -m "Add fresh empty site"
git push origin source
Add the Hugo theme. This site uses minimo theme
Why minimo theme? It’s clean/minimalist. It supports categories/tags, renders correctly on desktop and mobile phones, and has built-in hooks to add custom Javascript and CSS.
git submodule add https://github.com/MunifTanjim/minimo themes/minimo
git submodule init
git submodule update
cp themes/minimo/exampleSite/config.toml .
Modify the config.toml configuration file to fit your site.
baseURL = "https://jcarmack.github.io"
title = "J. Carmack"
[params]
  description = "Carmack static site"
[author.social]
  codepen = ""
  email = ""
  facebook = ""
  github = ""
  instagram = ""
  twitter = "ID_AA_Carmack"
  linkedin = ""
[[menu.main]]
  name = "Blog"
  weight = -70
  identifier = "jcarmack"
  url = "https://jcarmack.github.io"
Commit the changes
git add config.toml .gitmodules themes/minimo
git commit -m "Add minimo theme"
git push origin source
Test the site
../bin/hugo server -D
If you open your web browser and you visit the address http://localhost:1313/ the site should load even if there is no content for the moment.
Add the first post
Replace the Hugo default template by the theme default template and generate the first post skeleton.
cp themes/minimo/archetypes/default.md archetypes/default.md
../bin/hugo new post/first-post.md
Edit the content/post/first-post.md file. There is only the front matter right after the generation. That is the way Hugo takes informations to generate pages. Improve it in the same way than this example.
---
categories:
  - Others
tags:
  - hugo
  - small talk
title: "Welcome to my new website"
slug: "Welcome message"
date: 2017-09-05T05:58:27+01:00
draft: true
---
Below the last line of the front matter, the one with the 3 dashes --- this is where you add the content of the post. The format used is Markdown. Copy/paste the following block to see it in action… And give an appreciated credit!
## Welcome

I'm very __happy__ to introduce my new website!
It's a static website that I have done in less than 3 hours with this [Hugo tutorial](https://fillmem.com/post/self-hosted-fast-secured-and-free-static-site/)
Test the site
../bin/hugo server -D
Publish the site with the new post
To let Hugo generator knows that the post done in the previous section is ready to be published the draft value in the front matter has to be set to false
draft: false
To be able to publish the site in one command add the publish_to_master.sh script at the root of your repository. This is the one that I use for this site.
Commit the changes just before the last step
chmod u+x publish_to_master.sh
git add *
git commit -m "Add the first post"
git push origin source
Run the script to publish your site
./publish_to_master.sh
Congratulations your first post is online!
Go visit it at your Github address. It’s something like https://jcarmack.github.io but with your Github username.
From there, start the extra goals tutorial. They are only nice to have additions and your site is perfectly usable without them. If you think you need them, let’s continue…
Extra goal 1: the beautiful code syntax highlighting
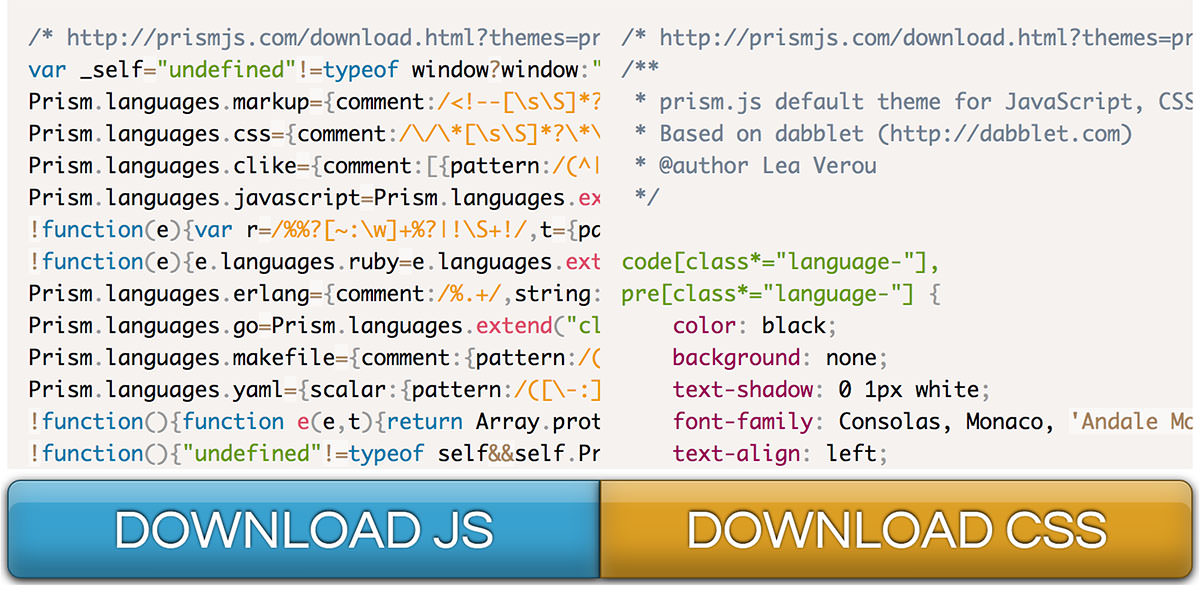
Syntax code highlighting is a must have feature for a developer site and so several solutions are available. This site uses Prism instead of the common choice highlight.js. Prism is better documented and more modular.
On the Prism download page check the languages that you use all the time. Let the one that you use from time to time not selected. The missing ones will be downloaded when needed. For instance on Fill The Memory the languages checked are:
- markup
- css
- clike
- javascript
- batch
- ruby
- erlang
- go
- makefile
- yaml
The plugins selected are:
- line-highlight
- file-highlight
- jsonp-highlight
- autoloader
Do your own selection of languages and plugins but keep autoloader plugin selected to be able to download dynamically a language not in your pre-selection.
Download JS and CSS files
Move Prism files to the static folder
mkdir static/js
mkdir static/css
mv ~/Downloads/prism.js static/js
mv ~/Downloads/prism.css static/css
Minimo theme adds two hooks to load custom Javascript files and custom CSS files. Let’s make the site load these files. Modify config.toml configuration file.
[params]
  customCSS = ["css/prism.css"]
  customJS = ["js/prism.js"]
Copy the code snippet below, opening and closing pre HTML tags included, in a post. The CSS font-family declaration should be highlighted in the page generated.
<pre>
  <code class="language-css">
  body {
    font-family: "Noto Sans", sans-serif;
  }
  </code>
</pre>
To highlight the languages not in the pre-selection the Prism autoloader plugin has to be setup.
Download from the plugin page all language grammars.
Create a components folder and move all grammars in this folder.
mkdir static/components
unzip ~/Downloads/prism-components.zip -d static/components/
Create a new Javascript file custom.js.
touch static/js/custom.js.
Add in custom.js file an instruction to make the autoloader finds grammars.
Prism.plugins.autoloader.languages_path = "/components/";
Update config.toml configuration file.
[params]
  customCSS = ["css/prism.css"]
  customJS = ["js/prism.js", "js/custom.js"]
Copy the Python code snippet below, opening and closing pre HTML tags included, in a post. The Python from statement should be highlighted in the page generated.
<pre>
  <code class="language-python">
  >>> from pygments.styles import get_all_styles
  >>> styles = list(get_all_styles())
  >>> print styles
  </code>
</pre>
Extra goal 2: A secured custom domain name
Github pages does not offer secured custom domain name. The best way to get this feature for free is to use Cloudflare.
First you need to buy your fancy domain name. One of the places to go for that is the domain registrar Gandi. To buy your domain name is the only thing not free.
Once your domain bought create a Cloudflare account. Add your domain name to your Couldflare account. Follow their guided setup, it is very well done.
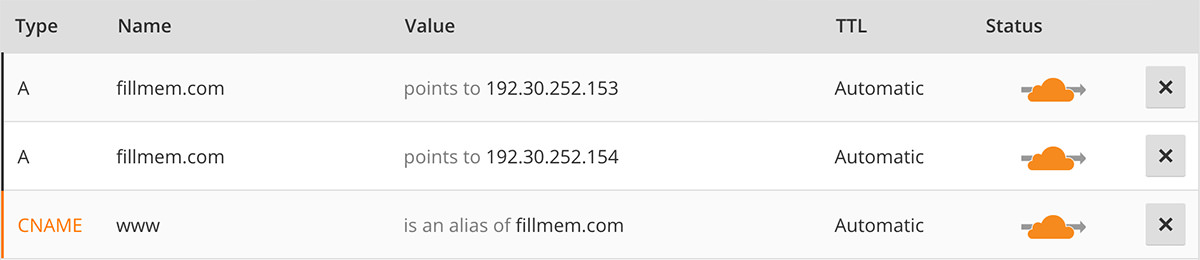
When you are asked to verify the DNS entries, add two A entries to point to Github servers. Up to date Github IPs can be found in their “Setting up an apex domain” help page.
Add also a CNAME record to redirect the www subdomain to the root domain
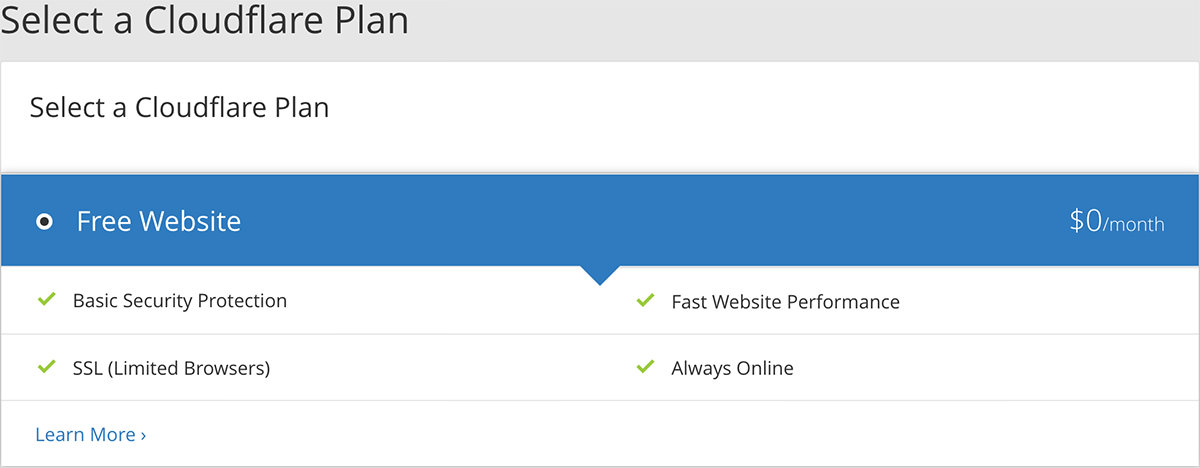
When you are asked to select a plan pick the Free Website plan
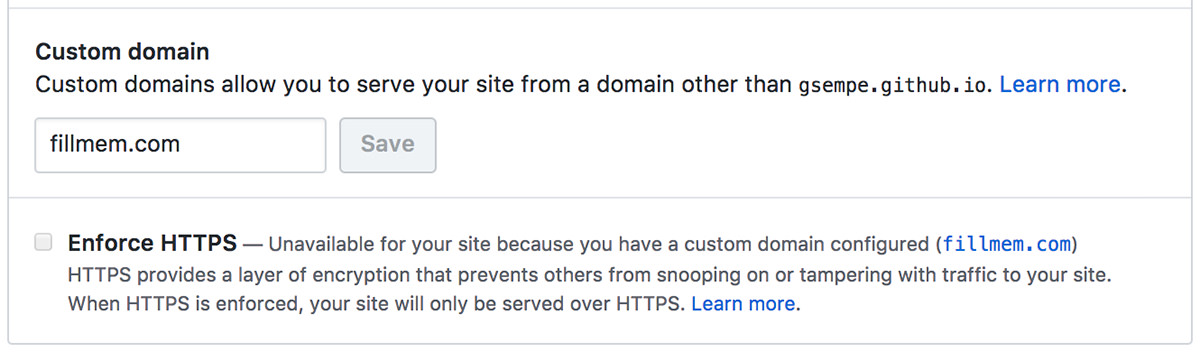
Once Cloudflare setup is done, add your domain to the Github Page section of your repository settings
Github automatically adds and commits to your repository master branch one file named CNAME. This file content is your domain name. Add this file to your local copy of master
cd public
git fetch --all
git rebase origin/master
git push origin master
cd ..
Copy the CNAME file to the static folder to have it deployed on each website generation
cp public/CNAME static/CNAME
git add static/CNAME
git commit -m "Add CNAME file in static folder"
git push origin source
Publish your site
./publish_to_master.sh
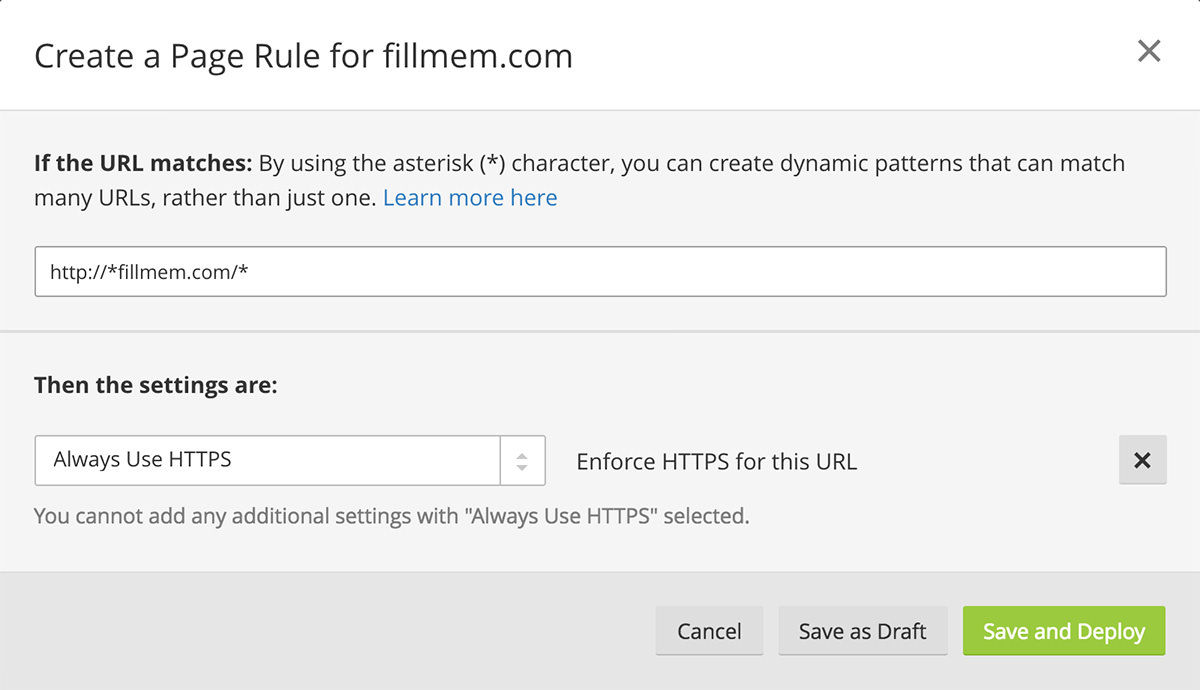
A good configuration redirects a non secured connection to a secured one. Cloudflare covers us on that.
Go to your site page on your Cloudlare account and select the Page Rules tab. Create a new page rule
Your custom domain name is fully set up but one has to wait the DNS web hierarchy is well informed about it.
It’s only a matter of patience. In few hours you will be able to share your brand new website.
Congratulations!